Chevrolet Cruze Forums banner

How-To: Remove 2011-2016 Cruze 1.4L Intake Manifold

2 reading
214K views 75 replies 36 participants last post by  djmckendall  
#1 · (Edited)
How-To: Remove 1.4L Intake Manifold


Overview:
This tutorial will show you how to remove the intake manifold. Because the PCV check valve inside the intake manifold is prone to failure, this will be something you'll have to do at some time in your Cruze ownership if it's out of warranty. You may also want to do this if you feel like removing the tumblers (aka "porting") the intake manifold for a mild power increase.


Tools Required:
- Ratchet
- E10 socket
- T-30 Torx bit/screwdriver
- Flathead screwdriver (1/4" works)
- Lb-ft torque wrench that will go down to at least 15lb-ft (Available on Amazon.com)
- Long needle-nose pliers
- 10mm socket


Procedure:
Most of these steps don't need to be performed in any specific order, and you can generally figure out how to do all of these with a bit of checking around the manifold, but this tutorial should give you an idea of what you're looking at if you've never done this before. Give yourself about 2 hours to remove and reinstall this for the first time, especially if you have a tendency to drop bolts into the engine bay.

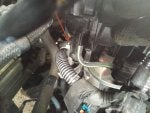
On the top-right of the intake manifold, remove the connector for the EVAP purge solenoid/valve by squeezing the two serrated edges and pulling upward. You'll have to squeeze pretty tight to get this one off.

Image


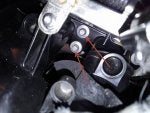
Directly to the left of that, remove the brake booster line by squeezing the two square tabs on the sides of the line.

Image


Directly to the left of that, remove the sensor wiring connector.

Image


Disconnect the wiring connector from the EVAP purge solenoid/valve by pressing the tab on the back. Once this is done, you can slide the solenoid's housing to the left to get it off the intake manifold.

Image


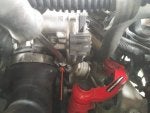
Work your way to the right of the manifold and remove the wiring connector from the throttle body, using a screwdriver to gently pry the locking retainer backward.

Image


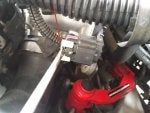
Using the same screwdriver, loosen the clamp on the intake tube. Don't pull the intake tube off just yet.

Image


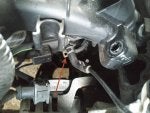
Move over to the left side of the intake manifold. Underneath it, there's a wiring connector that is held on by a clip. Use your pliers to pull the clip off, and pull the connector out.

Image


To the right of that, you'll see a vacuum hose going into the manifold. Use your pliers to slide the clamp back, and pull the hose out with a twisting motion. DO NOT put pressure laterally on that hose or you will break the barb fitting off the solenoid. Don't press up, down, left, or right on that fitting; ONLY twist to loosen the hose and pull straight back. Alternately, you can try disconnecting the hose from the plastic line using the other hose clamp.

Image


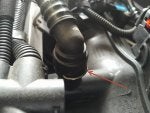
On the top of the manifold, remove the corrugated PCV hose by pulling the clip outward with your pliers. Hold on tight; if this goes flying, you'll be in for a fun time trying to find it.

Image


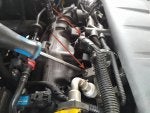
Next, we move to the top of the manifold. There are two T-30 torx screws holding the fuel rail down. Now, you can bypass the next few steps and simply disconnect the fuel line with a fuel line disconnect tool, but then you have to deal with gasoline under pressure, and that doesn't really save you any time.

Image


Unscrew the 10mm nut from the fuel rail, being careful not to drop it.

Image


If you haven't already, pull the coil cover off and pull up the wiring harness from the resting positions as shown below. This will allow you to pull the wiring harness off the fuel rail.

Image


Lift the fuel rail and the injectors should slide out fairly easily. Once you have some leverage, start from the driver side and remove each of the injector clips using your pliers, being careful not to lose any. Once removed, the wiring connector will slide right off the injector.

Image


Next, remove the 6 E10 bolts holding the intake manifold on. Be sure not to lose the wire you disconnected the 10mm nut off of a few steps up, as it's being held down by one of these bolts.

Image


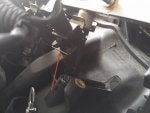
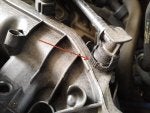
With the bolts removed, lift the passenger side of the manifold and check underneath. There's a wiring harness held down in two locations. The first is a gray tab. To remove this tab, you'll need to squeeze the other side of it (you'll see what I mean when you look) with the pliers and push through. Squeeze the retainer horizontally.

Image


Further down, you'll have a second connector. Disconnect this one as well.

Image


At this point, the the only thing you'll have left to do is disconnect the intake tube. Wiggle it side to side while pulling and it will come off.

Installation is reverse of removal. Simply follow each step backwards to make sure you don't forget to reconnect something. Torque the E-10 bolts back down to 15 lb-ft and the fuel rail screws and nut hand-snug but not tight. With the intake manifold off, this would be a good time to do any degreasing you want to on the back of the engine.

Important note: be careful not to get any dirt or oil into the bolt holes. If you do, oil doesn't compress and neither does dirt, and you can easily strip the thread or break the bolt If you suspect you got any dirt or oil in those holes, blow them out with compressed air. You should be able to screw those bolts in by hand freely until they need to be tightened. If you can't and you start finding a significant amount of resistance, you have debris inside and you need to use a tap to clean out the threads. Just something to be mindful of when you're doing this.
 

Attachments

#3 ·
I believe that's an aftermarket shift assembly for the 1.4L manual transmission.
 
#5 ·
Great Post, just a few questions.

"With the bolts removed, lift the passenger side of the manifold and check underneath. There's a wiring harness held down in two locations. The first is a gray tab. To remove this tab, you'll need to squeeze the other side of it (you'll see what I mean when you look) with the pliers and push through. Squeeze the retainer horizontally. "

Does the Gray tab release the "zip" tie from the bundle of wires, or does it release from the intake, leaving the wire strap on the wire? Maybe you're squeezing the back of the wire connector "barb" and pushing the assembly through the hole. If there's one there.

These wire harnesses seem to be weird. Take for example the cold air temperature sensor at the airbox. You can lift the wiring harness and cable tie, up and out of the slot on the airbox, but you can't release the zip tie. Maybe these are different and easier. Try not to cut them, as there is typically no hole to route a traditional zip tie though.

I'm assuming that before you removed the fuel rail from the injectors, you removed the fuel rail assembly with the injectors from the manifold. Did you use new o-rings on the bottom of the fuel injectors? Traditionally I think this is the best practice, and while they seem to be available $10 per injector for o-rings is an expensive proposition. Any problems with reuse?

What type of sealing surface is between the fuel rail and the injector? I guess you probably didn't have to disrupt this seal, but you'd have to remove the fuel injectors to clean and drill in the intake to make the mod? Yes/No?

That seems to be a weird wiring connection with a clip right below the throttle body. It was a wiring connection that's released with one of those wire quick connects?
 
#6 ·
The gray strap releases the manifold from the wiring harness, leaving the strap on the wire.

I didn't remove the fuel rail from the injectors. I simply lifted the injectors out, fuel rail and all, and set it off to the side. I did not use new o-rings. No problems with re-use.

No clue what sealing surface is between fuel rail and injector; I didn't disconnect the injectors from the fuel rail.

You do have to remove the injectors to modify the intake, but again, you can remove them still attached to the fuel rail.

There's no quick disconnect on the wire under the manifold (there isn't one under the throttle body); the clip holds the connector in place.
 
#7 ·
Nice writeup! I'd suggest specifying which engine(s) this writeup is for.
 
#9 ·
Thanks for a timely post (at least for me)! I had ordered these parts (intake manifold and valve cover) a few weeks ago, and couldn't find a write up for the intake manifold. I was going to purchase access to Alldatadiy to get this done this weekend. Now I won't need to, and hope to get this done Saturday while it warms up here in Michigan.
 
#12 ·
OK just trying to compleatly understand this. Failed PCV valve builds up too much pressure and blows manifold gasket correct? If that is wrong then question is null. If you weren't to take care of this problem quickly, it's from my vague understanding that oil can get pushed places it doesn't belong do to an increase in pressure from the failed valve. Places such as in the turbo as well.
Not long ago I went about a week before getting repaired under warranty. They dignosed and told me I would be fine to drive it to and from work. About 30 miles round trip. Just curious if oil being pushed into the turbo or somewhere else I can't think of could cause a bit of a loss in response and power?
 
#13 ·
This question would be better asked in the main pcv thread I have stuck in the powertrain 1.4 section of the forum but that's what appears to be happening. The pressure appears to be causing seepage and leaks all over the engine. I

I don't think you'll blow the manifold gasket though. That's already under pressure from the intake on a regular basis.

Your loss of response and power is due to the huge boost leak you have in your intake manifold with the check valve gone. You'll also burn more oil as a result. Check out the "pcv system explained" thread in that section I mentioned

Sent from my BlackBerry PRIV using Tapatalk
 
#16 ·
So I'm working on doing this replacement today. It took me about 90 mins. to get everything disconnected and the manifold out. The last two wire harnesses were a pain, and I ended up cutting the connecter on the small one after 15 mins. of trying to push the clip through the hole from the back side. Outside of that, only one small issue so far.

The wire retainer on the injector harness... can you purchase those anywhere? One came out as I pulled the harness up and out of the way, and I haven't found it yet. Seeing as I'm staring to put things back into place, I needed to know if I have to keep looking or if they are able to be picked up a local parts store or even the dealership if needed. Any input on that would be appreciated.

I've noticed a few differences on my 2011 Eco vs. the tutorial, but nothing that stop me in my tracks. Hope the install goes well, and then on to the valve cover after this.
 
#17 ·
For what it's worth, if you're just porting the manifold and not replacing it or really digging in, you don't actually have to remove it completely, just lift it up.
 
#18 ·
I agree if you're not replacing, you can do that work without removing. Unfortunately I needed to replace mine (that redish/orange valve is gone), and since the part can only be ordered as an assembly with the throttle body, fuel rail, etc., I had to remove it. Figured after 190,000 miles I might as well use the new fuel rail and injectors since I had them. :)

Still can't find the wire retainer for the injector wire harness. Other than that I'm done, but have been cleaning up a bit before I venture out. I don't foresee that harness connector coming off, but there is a reason they added the wire retainer. I'd like to get one to add back there.

All told not bad, and I did the valve cover as well (since that was shot too). That's super easy in comparison, and thankfully I read that I needed some RTV so all went smooth there.
 
#19 · (Edited)
Can't seem to get the car to run properly, been trying to diagnose what the issue is. Runs rough w/ 8-9 psi of vacuum on high idle upon start (1,500 RPM) and drops to below 2 psi vacuum after the engine warms up and idle drops to ~750. I've been over all the connections a few times, but can't seem to find the issue. Engine is misfiring, as it sets the Check Traction Control / Stability light. Changed both the intake manifold and the valve cover, can't find what might not be connected.

Any suggestions as to where to look?
 
#21 ·
Thanks Xtreme. This morning I decided to go back at it. Checked every connection, started the car... same misfire and huge leak issue. So, decided it must be the gasket on the manifold. I removed the manifold, and while things looked good... I took the gasket off, cleaned it well, reinstalled it, and the manifold and all is good. So, lesson learned... I thought everything was good upon install, but it wasn't.

Yesterday it took me nearly 2 hours to get the old manifold off, and the new on, trying to figure out how to reach some of the harnesses and how to remove a few of them. This morning (2nd try) it took 30 mins. to remove it, 10 to clean the gasket and such, and 20 minutes to put it back together. In one hour I was all set, and things are good.

Oh, bonus... when I took it for a test drive it was raining out. Turned on the wipers and saw the injector wire harness retainer stuck under one of the wipers. Grabbed that, and now I don't have to find one!
 
#23 ·
I used this guide to replace my intake (and valve cover while I was at it, help from that thread as well) very useful info. Keeping the old intake to make the mod when the replacement or the other Cruze have a failure. It was 4 hours start to finish, which include removal of intake and valve cover, a 6 pack of Revolver Brewing Blood and Honey, 2 redbull and Vodkas, pizza, trip to auto parts store for fuel line tool, reinstall new parts, test drive and clean up. Had a buddy over for moral support and it was a good night. Engine running very smooth. CEL cleared itself(had battery disconnected) and hasnt come back on. Will put some miles on tomorrow but I expect it is good. Thanks for the write up.
 
#24 ·
Slight bump of this thread to ask a question about the replacement of the intake manifold....

I did order and receive a new manifold (plan on doing the mod with the old one) and going to install it soon.

Do I need to follow any procedure as far as relearning anything? The new intake comes with a new throttle body, injectors and some other sensors, so that was my concern....will the computer see, and learn the new sensors etc? Or will I get some CEL for a short period?
 
#25 · (Edited)
I think it's plug and play, provided you don't stroke the throttle plate on the electric throttle body. I read the control theory on that, and you can force it to do a calibration if you have to without a scan tool and it also does auto calibrations itself. People that manually open a throttle body for cleaning have had problems. You shouldn't need to clean it as it's new.

After watching youtue video's of these electric motor controlled throttle bodies, I would never open them with a finger. Especially when plugged into the car. The gear reduction they have to create force is incredible. Ford claims in their procedures that it can sever a finger if the motor actuates with a finger in there.

Remember GM engines that had coolant lines to the throttle body to keep ice from forming? There's no need to do this today. The Throttle Body can easily break right through it. Possibly the reason why they have the throttle body geared the way they do. That plate is geared down for a lot of torque from that little electric motor. I don't know why you would need all that torque otherwise. Especially on a non turbo pressurized intake.. (As many of the Throttle bodies are the same design for normally aspirated cars.)

The injectors as long as they are wired to the correct plug in the car they should be good.

The other items are emission valves that receive open close signals from the computer, they should be good.
 
  • Like
Reactions: mikestony
#26 ·
Yeah it's all plug n play. No need to re-learn anything; the ECU adjusts as needed. That said, you should be unplugging the battery when you're unplugging a bunch of sensors and injectors anyway, so it will relearn as part of that process.
 
#28 ·
Update to my install 8-8-17....
Installed after work last night with no issues. Quite a bit of oil in the intake, throttle body and pipes. Only leads me to believe my intercooler is coated with oil :( Funny as I did not notice any oil loss between oil changes.

Anyhoo, time to take my old intake, clean it up and get Xtreme's mod when I get some more sheckels together :D

Thanks a million to @XtremeRevolution for this (and many other) how-to threads :D

Cheers!
 
#29 ·
Quick heads up that I am getting a different story from two different dealerships regarding what comes with GM part number 55581014. Parts guys are now saying that the throttle body, injectors, fuel rail, etc., are now sold separate.

I ordered the part from Amazon, and received the part with broken plastic tabs (bad/missing packaging foam). I returned the part, but Amazon Services was sold out and I had to order from a different seller. For about the same cost, I received only the manifold despite the description saying otherwise.
 
#30 ·
Yeah I just had same experience today. Ordered intake from Amazon-GM Parts Direct or something like that. All I received was intake-no fuel rails, throttle body, injectors, etc. Called them and they said GM has superceded the part with one that does not come with all the parts advertised in the listing. Gave me $93 credit back.
 
#32 ·
Based on a google search it appears that GM may have changed the part number of the intake to 25200449. I'd suggest doing your own review to see if this will work for your needs before ordering it. It looks like it's a bare intake but I think gaskets were included. Looks like there's a lot of GM dealers on ebay with prices from 168-$178 based on a quick glance. Quick searches show 55577314 and 55581014 are part numbers for what appears to be a fully loaded intake, but I was not able to find application data, specifically for 55577314, but that one is still at Rockauto for $300.

There's also been mention of Dorman 615-380 but as of this post that part number is really fresh, and I only see one seller of this on ebay. I couldn't find any google hits on it.

I'm guessing the Dorman being aftermarket will have to come down significantly less than $170 to have a sales advantage. Time will tell.